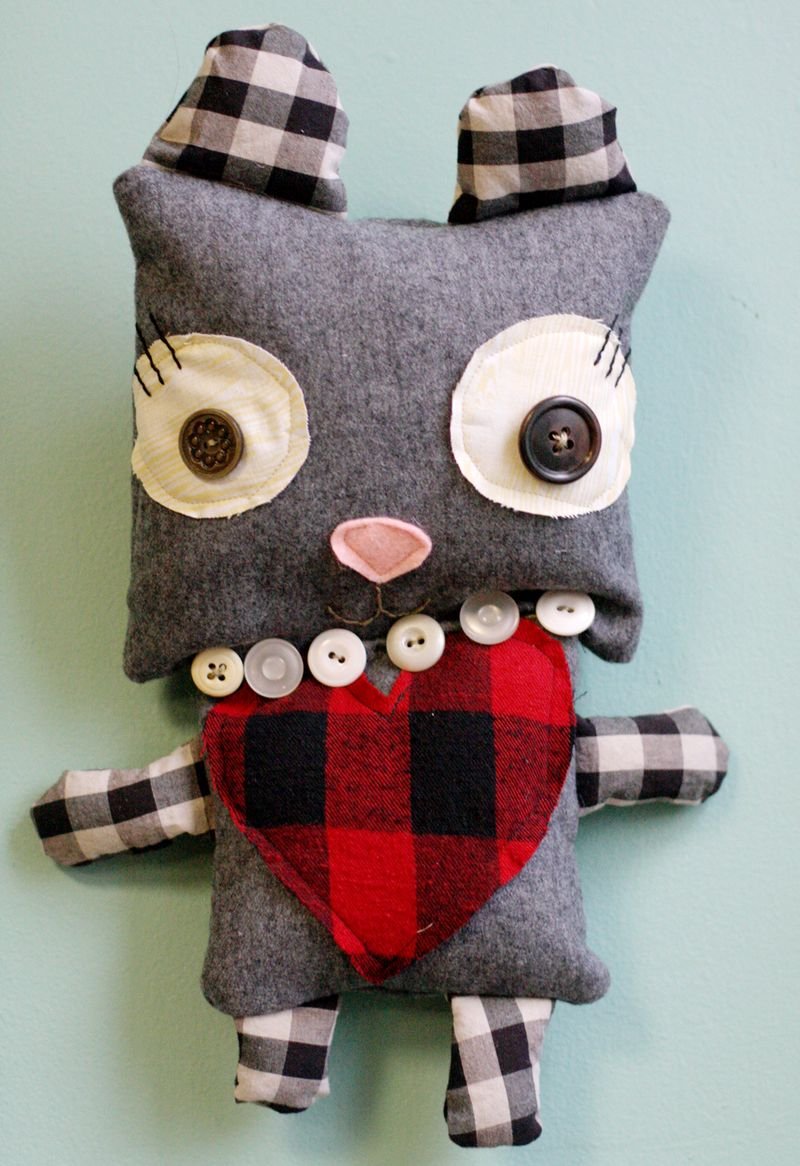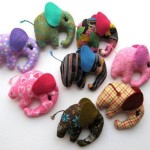
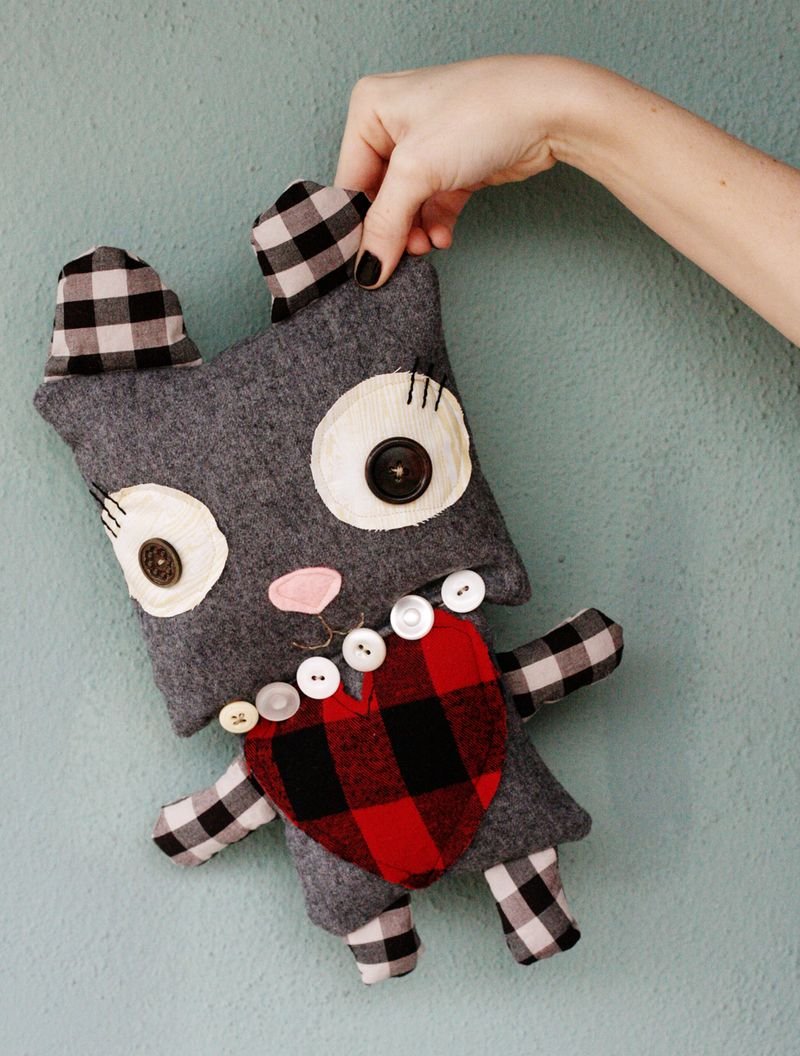
How to DIY a stuffed toys craft: funny bunny
Interesting and original soft toy in the form of a bunny is very simple craft. You can make it, using only the materials at hand. First you need to make a simple pattern.
Materials
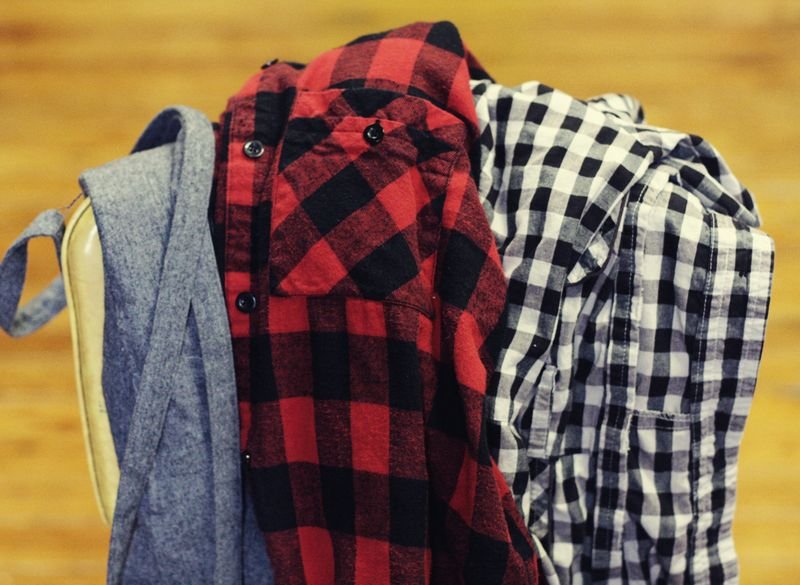
For the manufacture of soft toy bunny you will need:
- old shirts of different colors;
- paper;
- ruler;
- pencil;
- scissors;
- needle;
- threads;
- needles for sewing;
- buttons;
- filler.
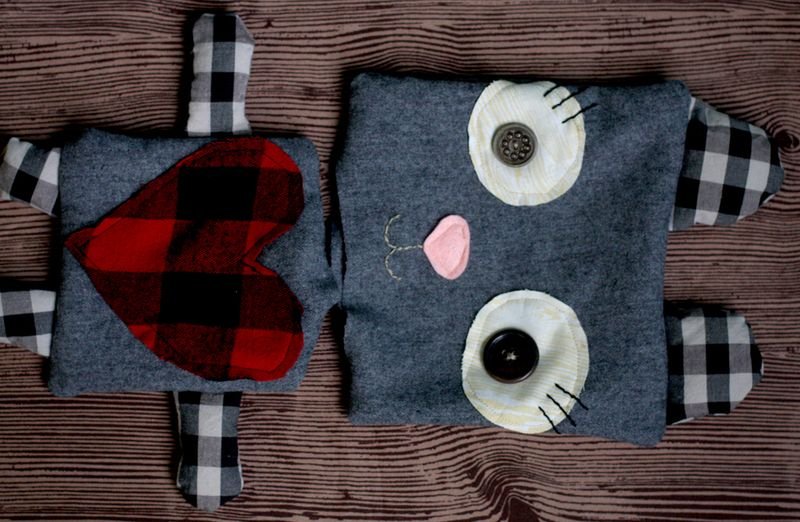
Step 1. Make pattern for toy. It will be very simple. The toy consists of square and rectangle. This is the head and the body of a bunny.
Step 2. On the basis of preset patterns, cut out two pieces of fabric for each part of the toy. Making the cut out of old things, try to avoid areas with seams that the toy looked more aesthetically pleasing.
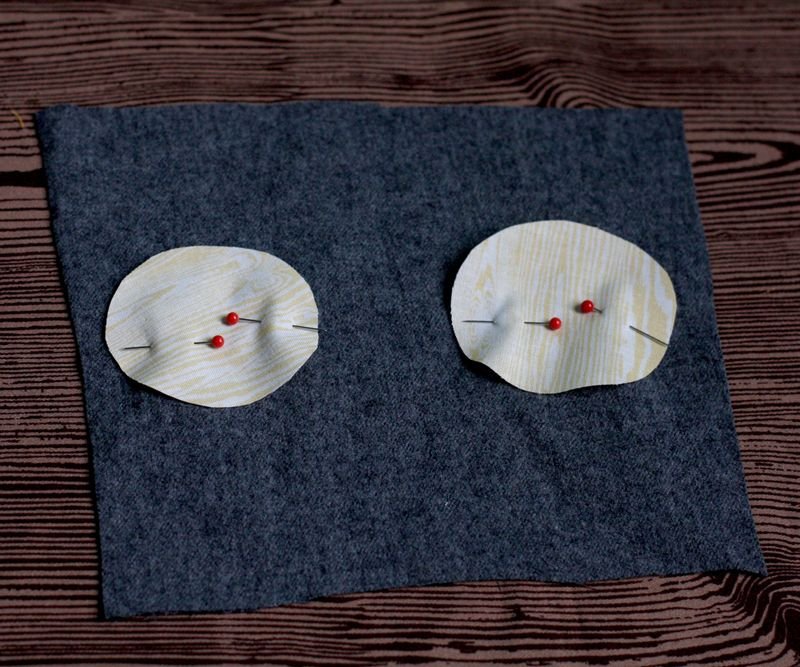
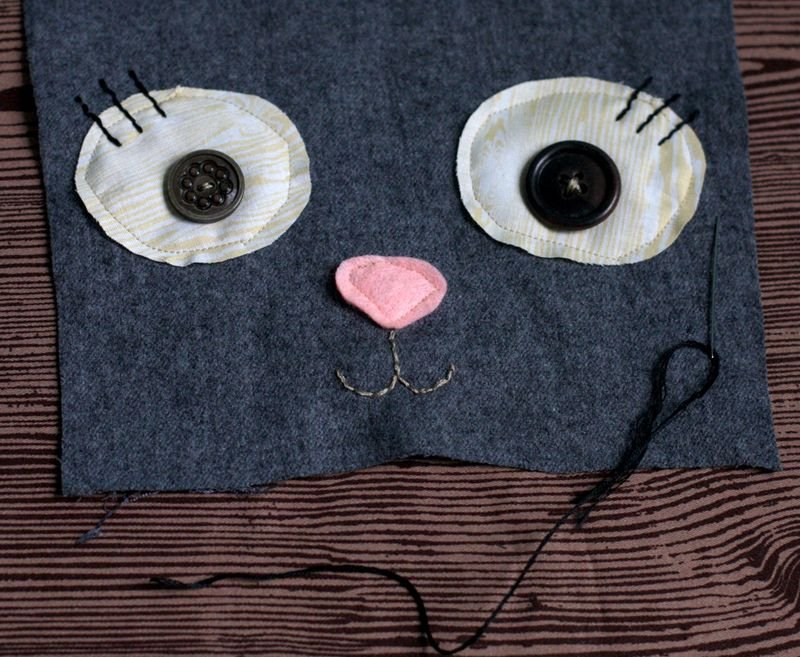
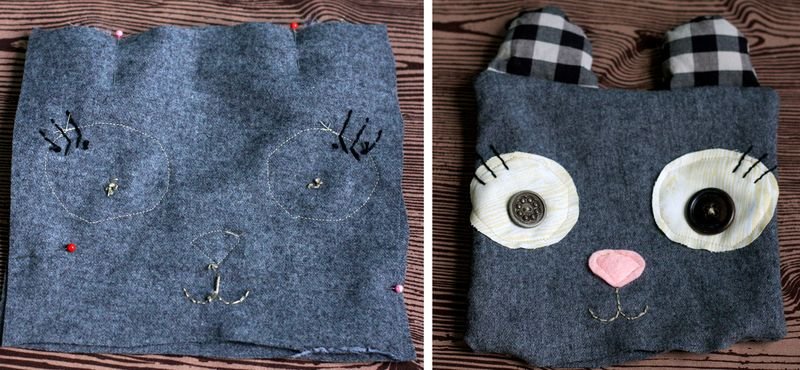
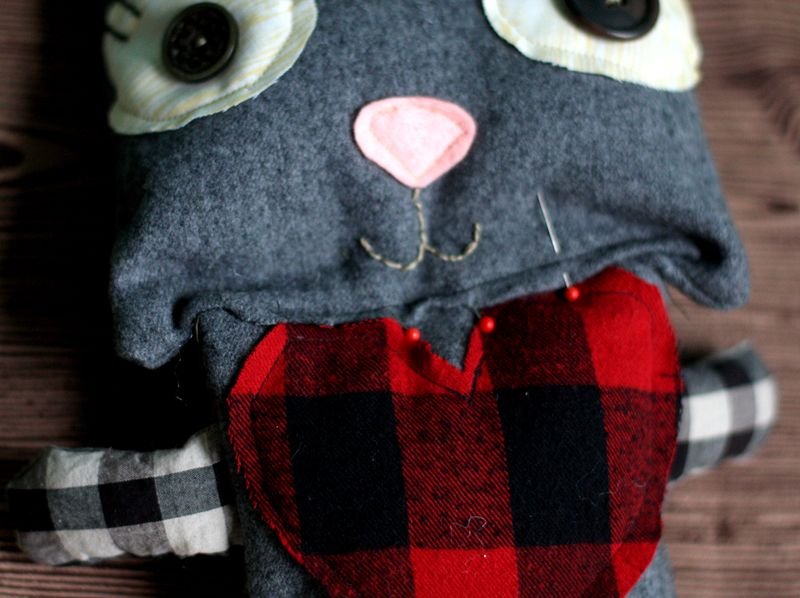
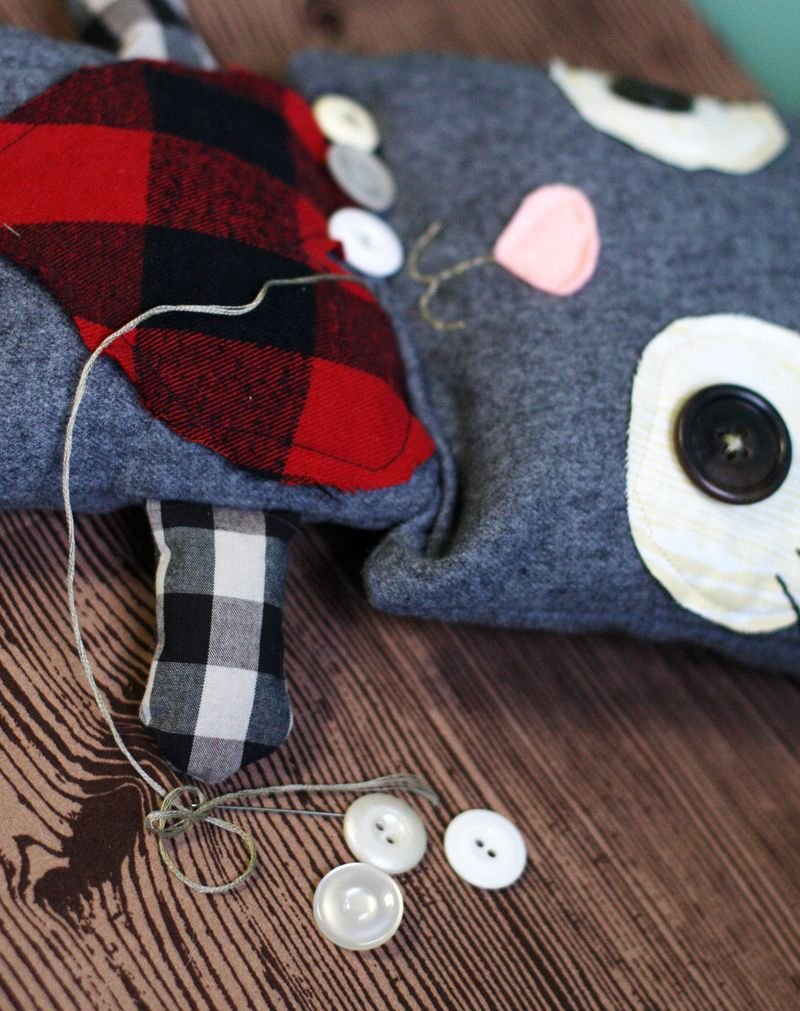
Step 3. Of contrasting color pieces of fabric, cut out the eyes and nose of the rabbit. Pin them sewing needles to the base for the head from the front side. Sew a simple stitch. Detail of embroider by hand, and the pupils of the eyes make, sew the buttons.
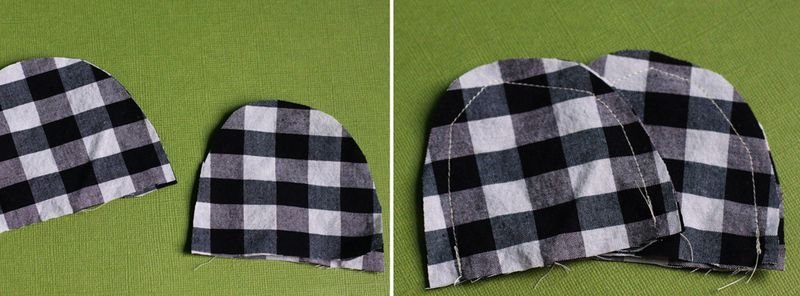
Step 4. Cut out the rabbit ears made of cloth. Just need 4 pieces of the same instance. Fold the pieces of fabric together and sew them. Fill ears, insert them between the two pieces of fabric for the head of a bunny, sew together, leaving a small gap for stuffing in the bottom part of the head.
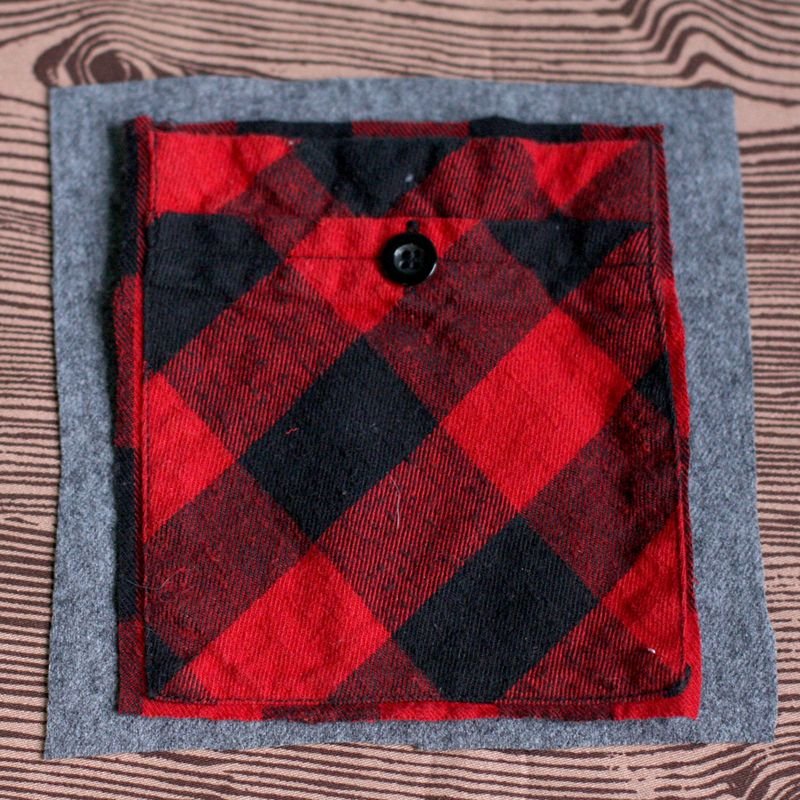
Step 5. In the back side of the body of a bunny sew pocket from a shirt .
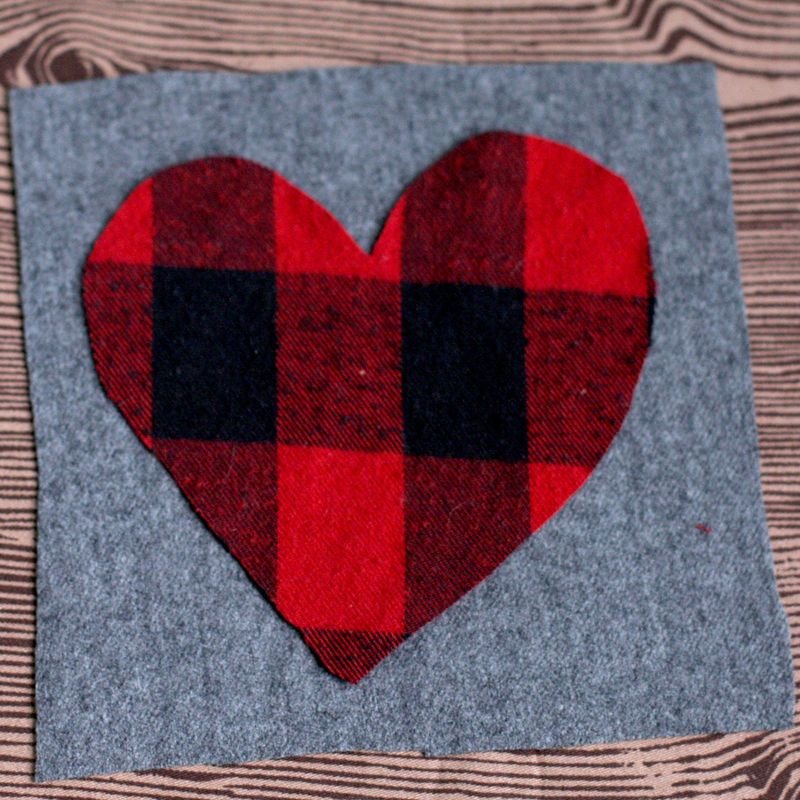
Step 6. Use heart send from the same cloth to decorate the front.
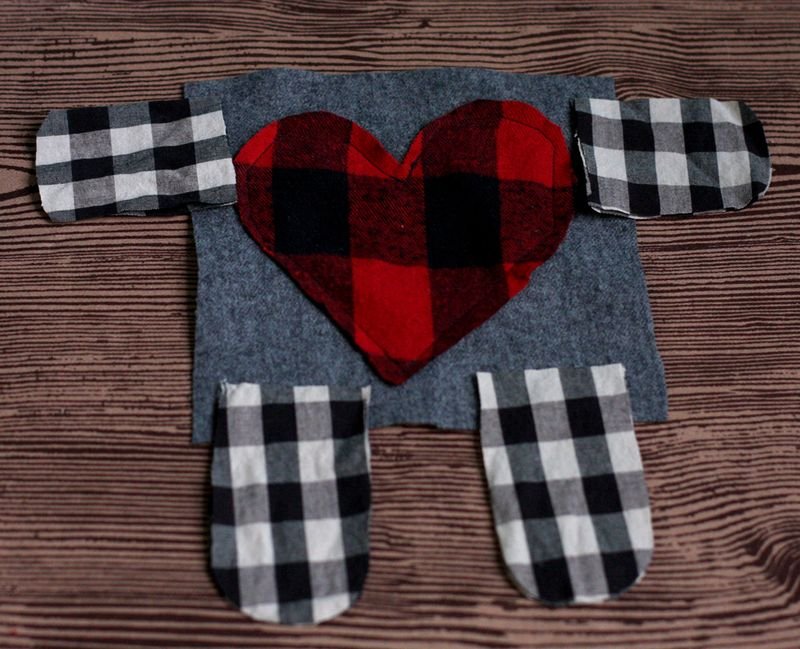
Step 7. Take a paws from the same fabric as the ears and sew them.
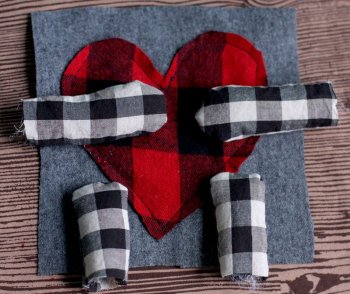
Step 8. Fill paws.
Step 9. Rotate body parts of craft toy face to face. Insert paws and foots between it, use sewing needles to fix it and then just stitch.

Step 10. Fill the head and body of a bunny, and then stitch them together manually.
Step 11. You can use buttons to decorate last seam.
Craft toy is ready!