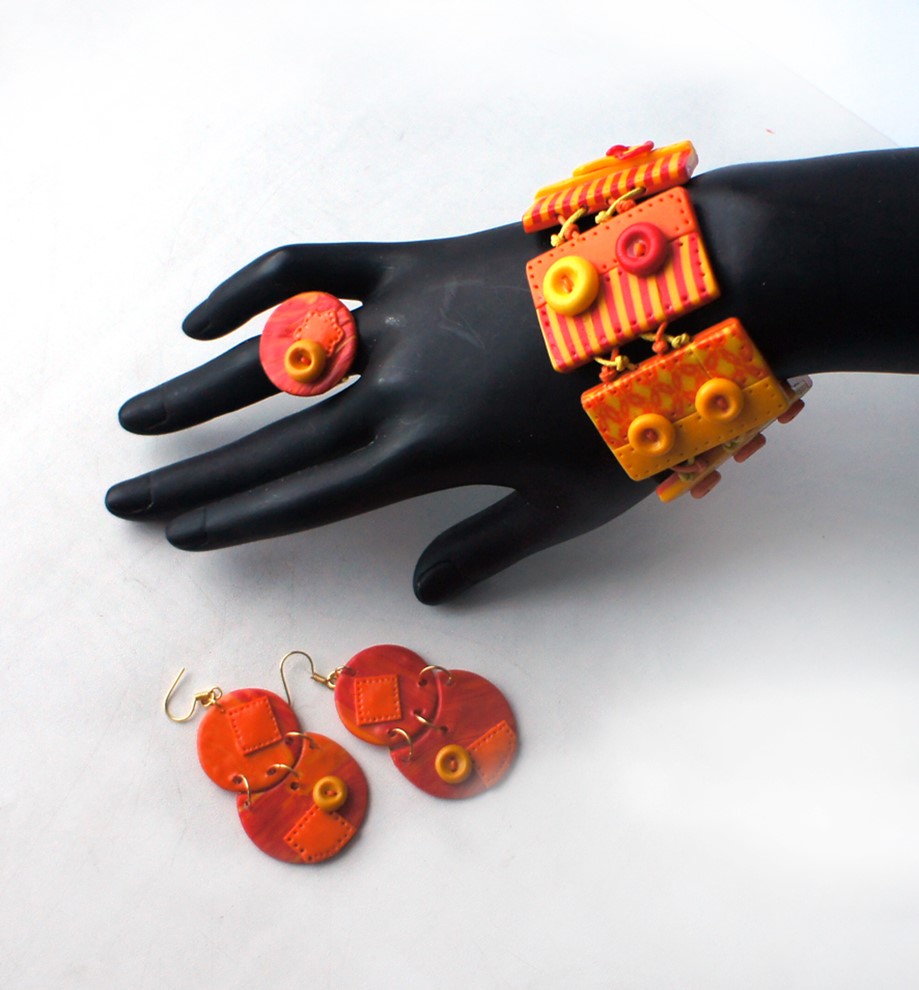
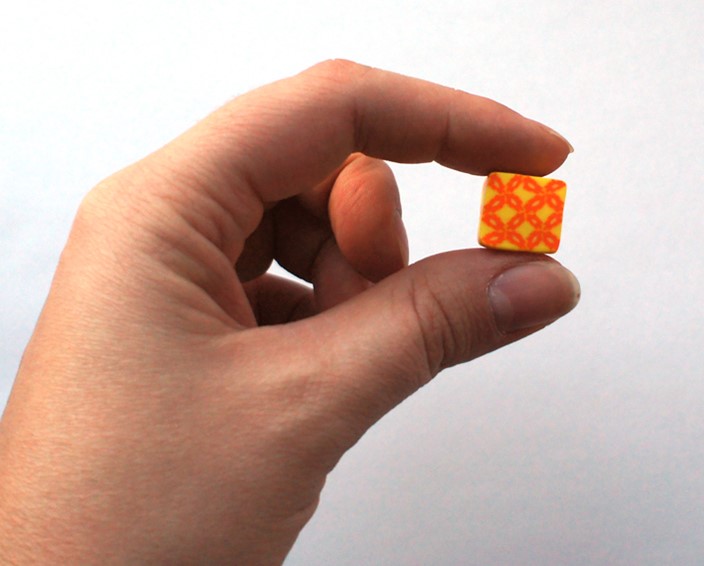
Bright accessories made with their hands. Handmade Polymer clay bracelet
In the spring, after a gray winter days, always want something bright and positive. To cheer up yourself and others, you can create a colorful accessories with their hands. One of the most colorful needlework techniques is a patchwork or quilting. In this tutorial I’ll show you how you can combine the aesthetics of patchwork and sculpting, making original bracelet made of polymer clay.
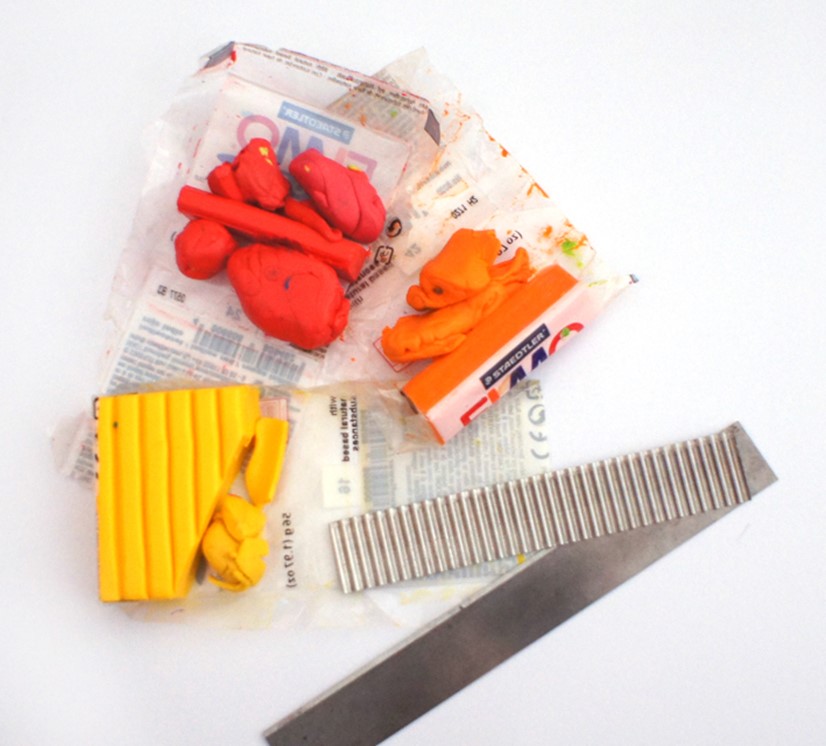
Materials and tools:
- Polymer clay
- Working surface: glass or ceramic tile with a flat smooth surface.
- Knives for polymer clay
- Satin paint
- Pliers
- Rings, brass, wax cords
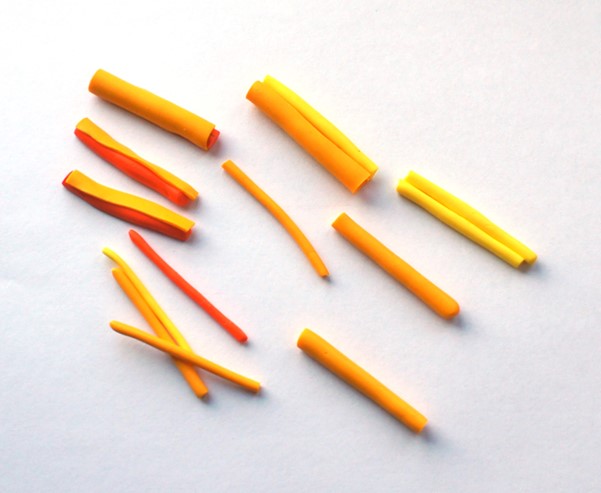
First, make a few patches of species-pieces for the bracelet. Roll out rather narrow strips of red and yellow plastic.

Carefully add them pile in layers, alternating colors and trimming the excess. The resulting rectangle is cut into a striped side. Got shred-blank with stripes. You can use more colors or stripes of different width.

Now let’s make a few individual sausages of different colors and thicknesses.
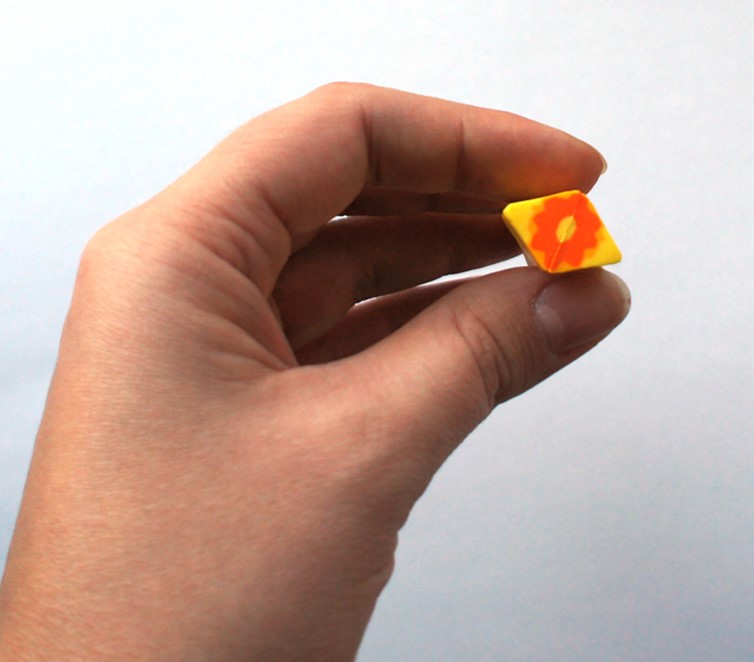
Spread of these figure-pyramid pattern. Using the plastic of different shades, for example, I put half of the flower. This technique is called Kaleidoscope. I needed a simple repeating pattern, and if you use more contrasting colors, you can get the effect of a kaleidoscope.

The resulting pyramid is stretched and squeezed, while maintaining its shape. Cut in half.

Fold mirror smooth sides. It turned out a kind of flower on the cut.
We now have in hand a rectangular sausage. Again, pull and squeezed it, trying to keep straight angles. Cut and again add up. You can repeat this procedure as many times as desired. I stopped at this repeating ornament.
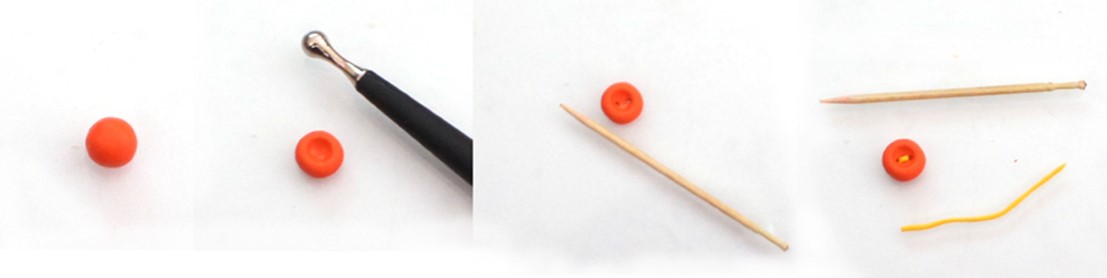
For decorative details bracelet, we will use the buttons and straps. Buttons I’m doing this: rolling ball and flatten his stack. You can use the round end of the pen. Then make holes with a toothpick, and a thin strip of plastic – thread. These buttons without strings, by the way, can also be used as a real, for example, for doll clothes.
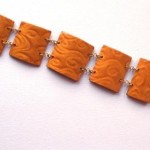
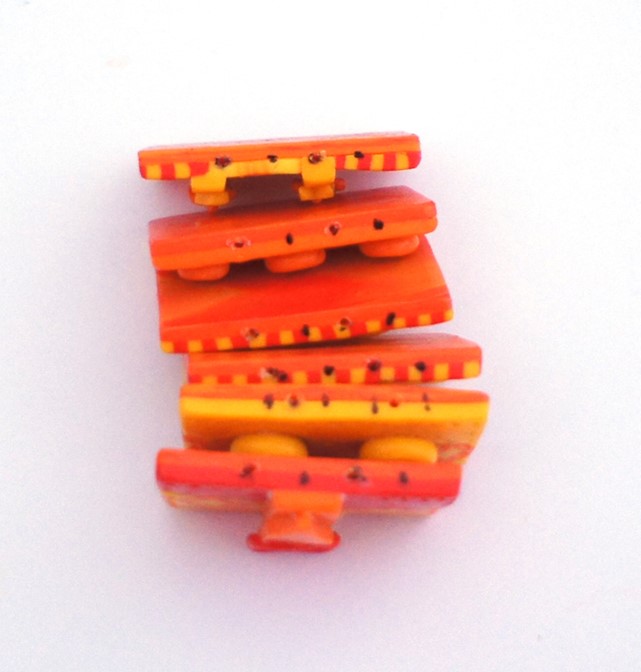
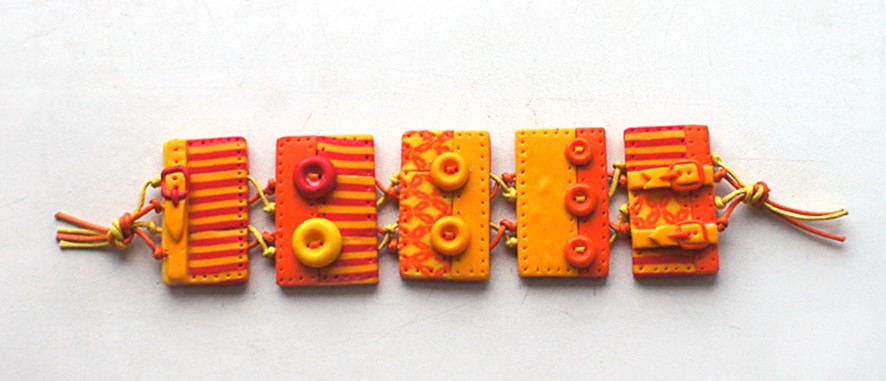
On a strip of any of the colors used in the bracelet lay our scraps. Combine plain and patterned piece. All cut on rectangles of equal size. Decorate buttons and straps. The thickness of the elements should be about twice the thickness of waxed cord. Send bake according to instructions on the package plastics.

Such bracelet blanks we got:

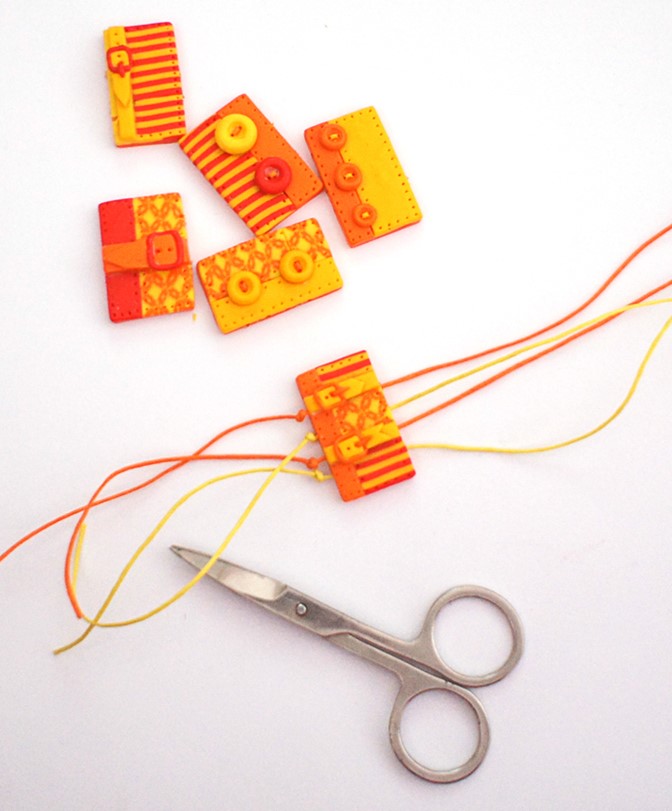
Note the marker where you want to drill the parts. It was possible to make holes with toothpicks before baking, but then it is possible to damage the image. Therefore, using a drill, make four holes in each element. There need special care that the drill was going exactly in the middle and not damaged parts.
Now we will prepare wax cords suitable colours and will collect the bracelet.

I took only two colors. Leaving tails, tying tight knots and the first element is passed. As a result it took me four lace, each of length 16 in (40 cm), you can first take stock.
Once again, I tied knots after the first part and secure it. Then put the laces to the next, swapping them. You can leave the cords in the same manner as in the beginning, but then the elements you need to fix with the nodes so that they do not stray and do not change their position.

At the ends of the lace in all four make beautiful nodes and we cut off the superfluous.
You can leave long tails and tie a bracelet with their help, but I passed rings through the nodes, with one side of the rings cemented the clasp. In the closed form lock under the nodes is not visible.
Можно было оставить длинные хвостики и завязывать браслет с их помощью, но я продела в узлы колечки, on one side I hooked lock on rings. В застегнутом виде замочка под узелками не видно.

This bright bracelet we got! And complete for bracelet can be made and other accessories such as earrings, ring or pendant.

If you liked this bracelet made from polymer clay, then be sure to take a look at this homemade Mica Shift technique bracelet.