
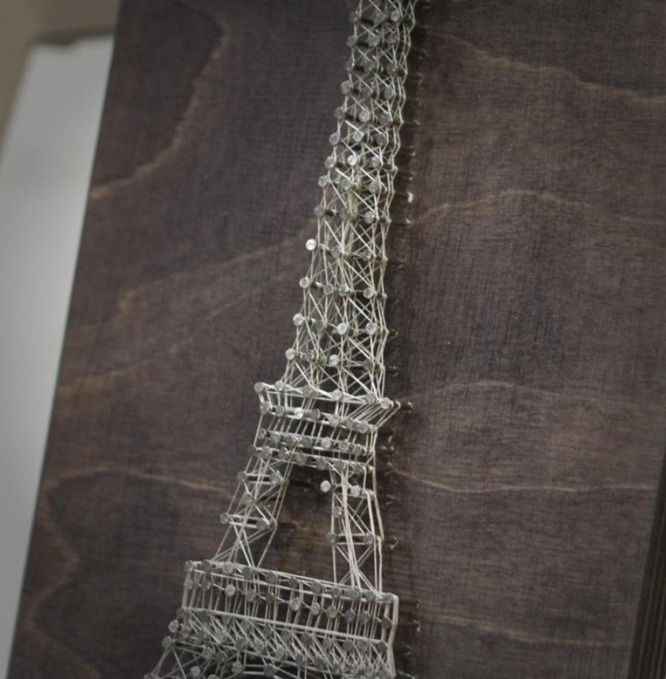
How to DIY Eiffel tower: Create interior painting in the style of string art
Today I want to share with you the mystery of creating amazing paintings in the style of string art.
What we need:
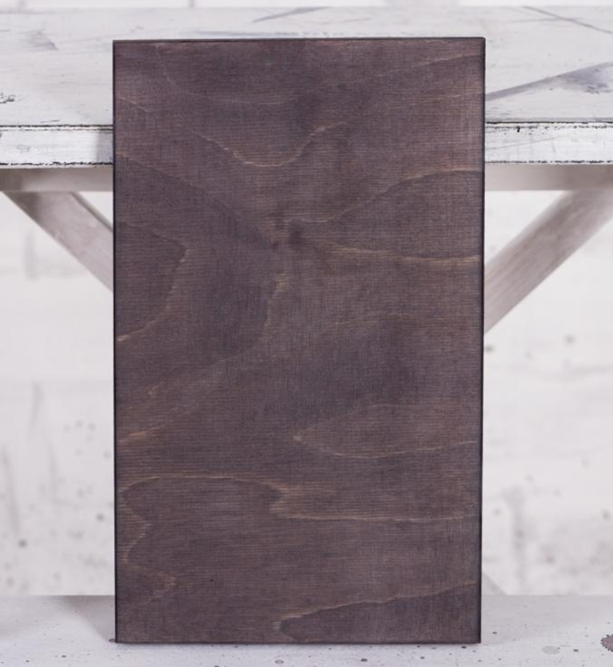
1) wood (I have sanded plywood 15×25 cm (6×10 in), thickness 1.5 cm (2/3 in);
2) stain (I have water “benevo tree” in 1 layer);
3) lacquer (water-based for the wood);
4) nails;
5) hammer (any);
6) thread (I used silver silk and nylon white);
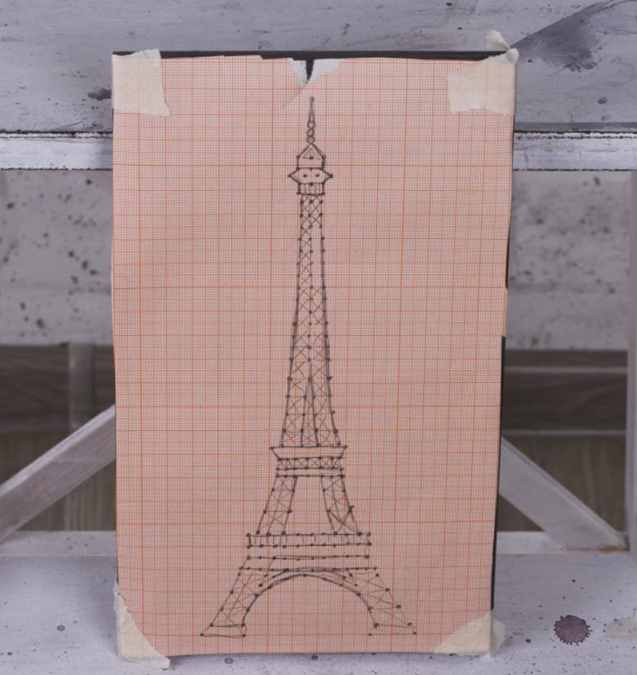
7) paper sketch (I have a graph paper);
8) glue (for fixing nodules);
9) Herculean patience.
Well, are you ready?!
To begin, cut our wood stains and varnish to give the wood a light pleasant.
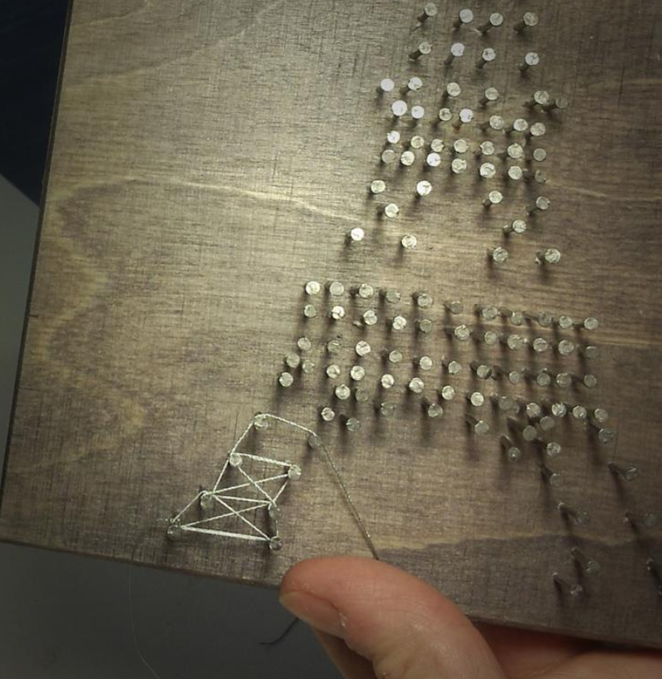
Then draw a sketch. We will make Eiffel tower. Attach the sketch to the board with masking tape.
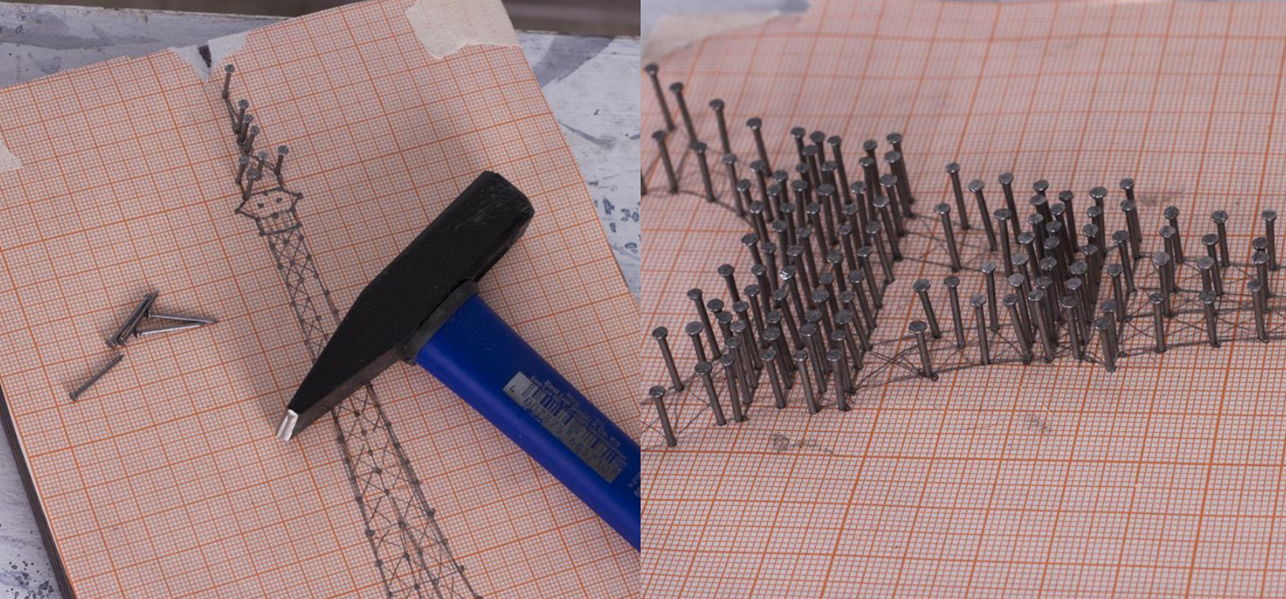
Then take a nail and a hammer and slowly begin to hammer in nails around the perimeter (try to keep the nails entered at the same depth, depends on the overall beauty of the picture).
Well … it’s finished.
Then remove the paper, in hard to reach places use a toothpick.

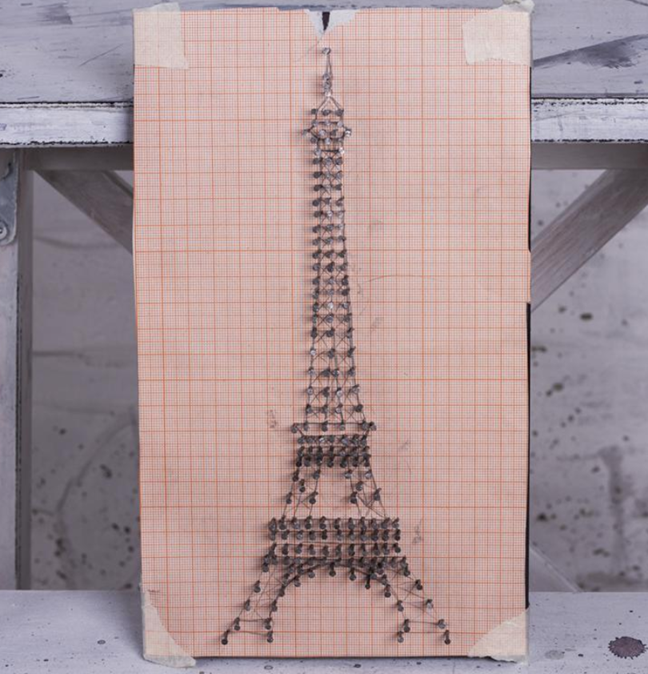
Take the prepared strings, tie a tight knot in any of the nails and start to wind the strings by checking with the original.
Continue, trying to keep the thread always in tension. Otherwise treacherous silk bloom at lightning speed and there will be at least offensively. How high will want to throw the picture out the window.
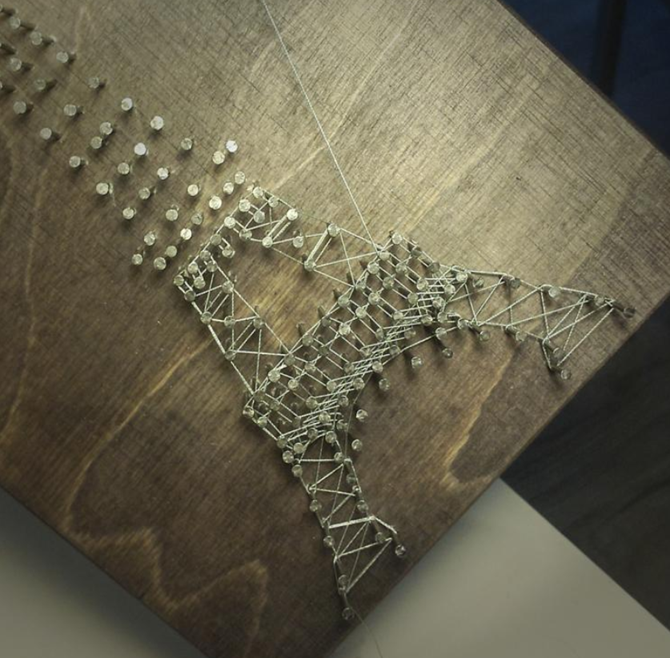
Don’t be afraid – at first always looks not very good, but then… 🙂
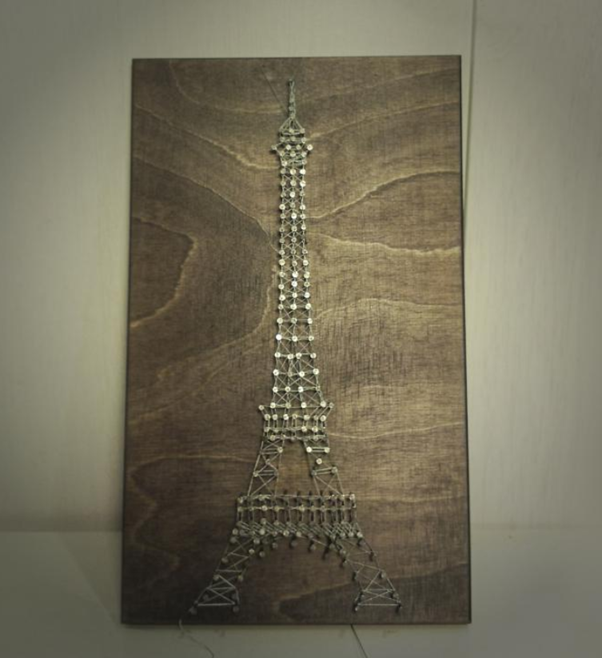
The first round is ready. I thought the tower appears dull, and I took a white nylon, pre-omitting the first layer to the middle of the nails, and repeated winding with white thread. And that’s what happened in the end. In my opinion, at least pretty.
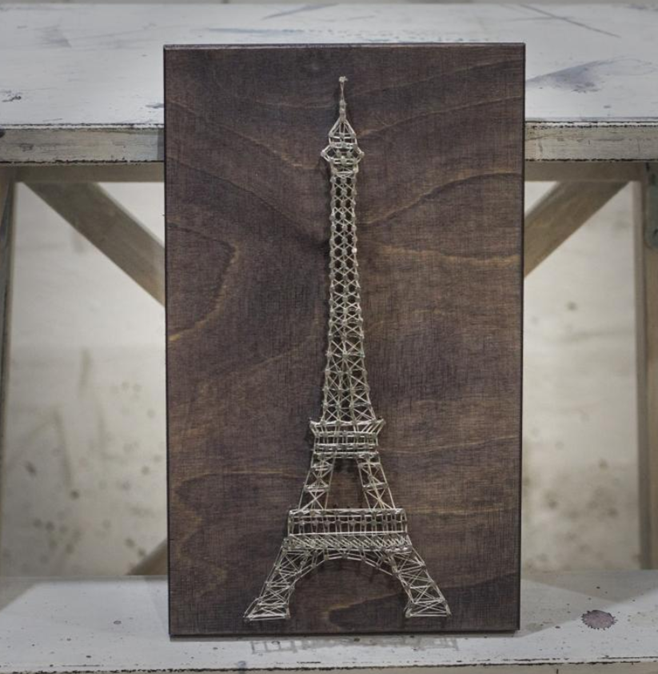
Don’t forget a bit of glue on each knot. And voila – the perfect gift for loved ones ready 🙂