How to make polymer clay creative figure. Biomechanical fish
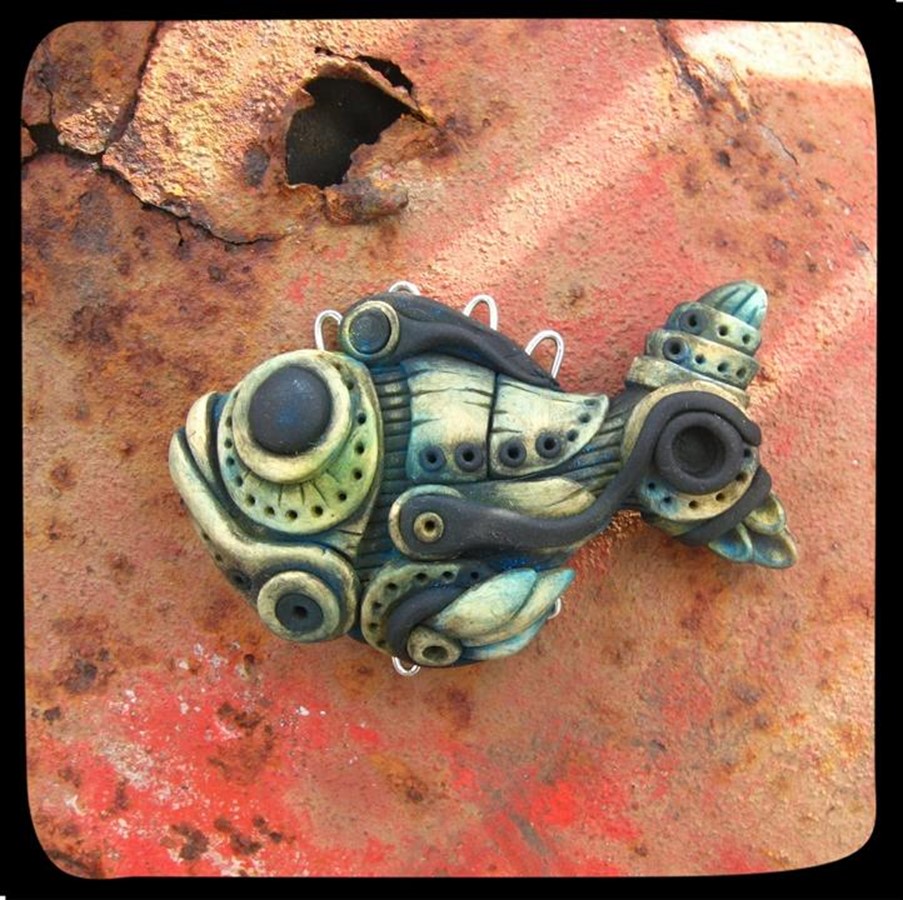
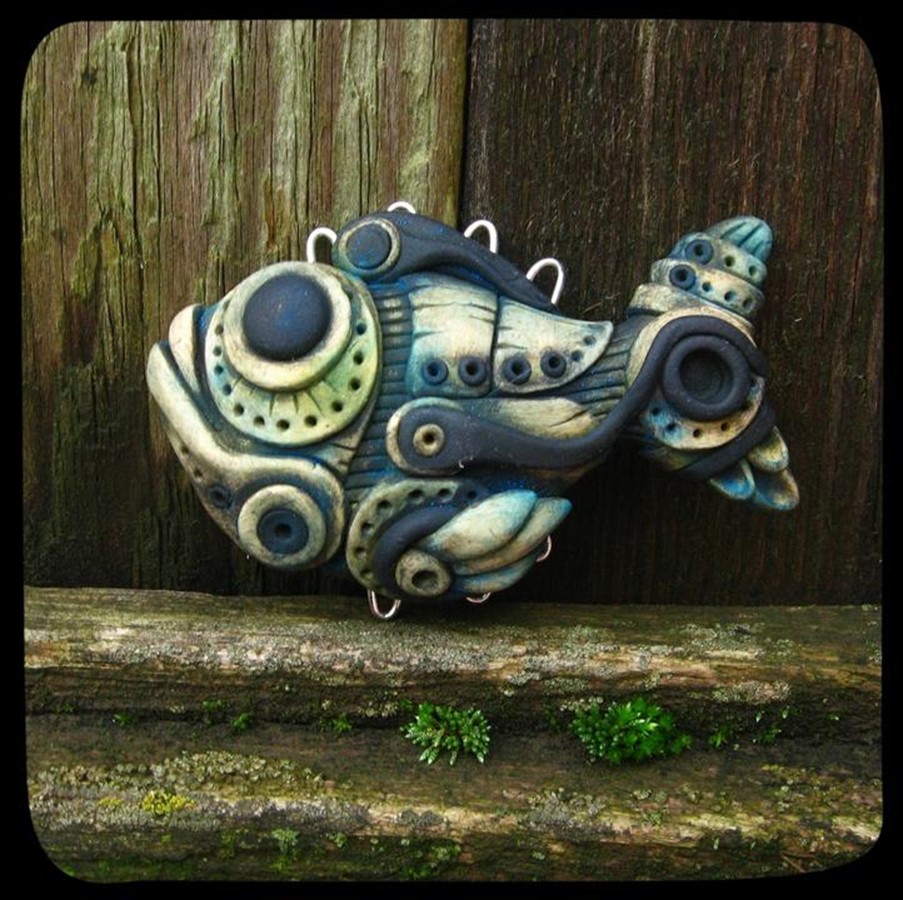
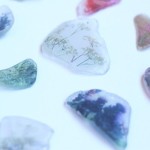
Today we’ll find out how to make a very unusual decorative style figure of polymer clay. The first works in the style of biomechanics appeared in the 1980 ‘s, and, as is obvious from the title, it is a fantastic connection of mechanical and biological elements. In our fish gear organically supplement the body of the fish, turning it into an unusual and hilarious cyborg.
For the manufacture of biomechanical fish you will need:
- polymer clay (any color you would like to base)
- the most elementary tool, usually I use in molding a scalpel, a pair of knitting needles of different sizes, needle, toothpick
- Pastel chalks and synthetic brush (2-4 people)
How to make fish from polymer clay
Mash a piece of clay to desired volume from the heat source, it becomes softer and pliable. Attach a piece of fish body shape, as shown in the photo. Because the space between the body and tail are pretty slim and it’s vulnerable and fragile, insert the metal pin, it will make the product stronger, creating a frame.
When the basic is ready, begin inducing entourage, giving fish a biomechanical design.
Attach the texture of lines in the base of the head and the tail. Next, roll out thin layer of polymer clay and simulate the “lining”. Our lines will be visible in between the roof sheathing.
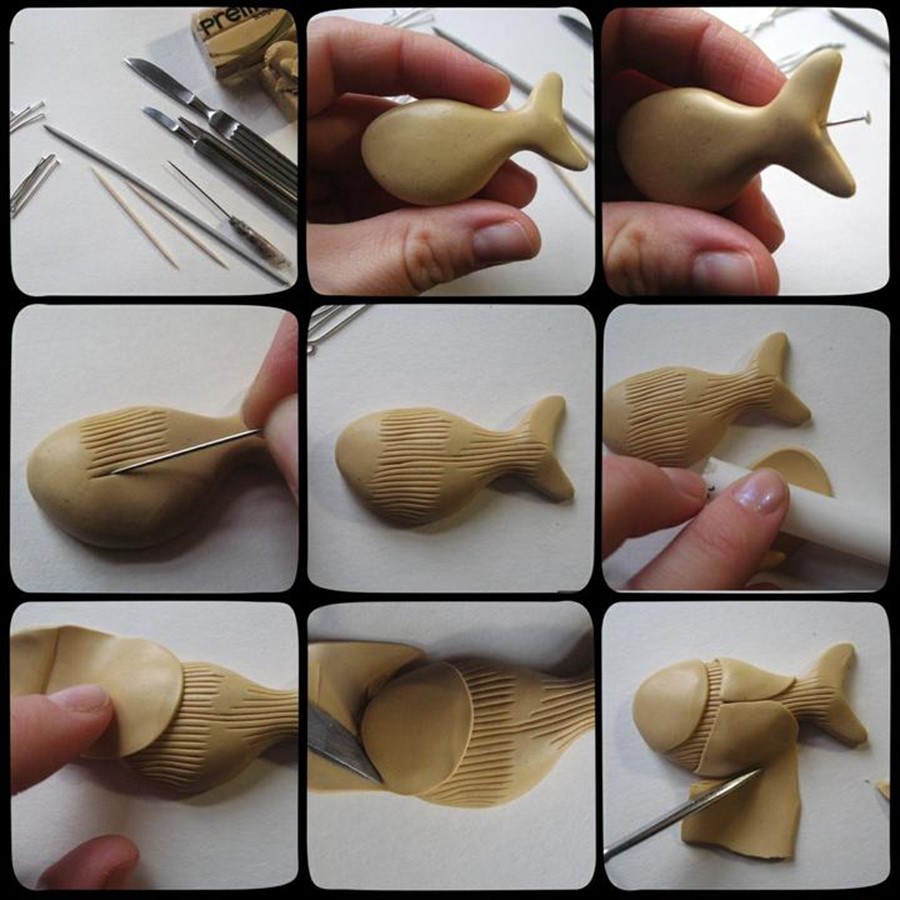
Create different types of decorative items to your own taste: patches, riveting, holes for wires, some scales.
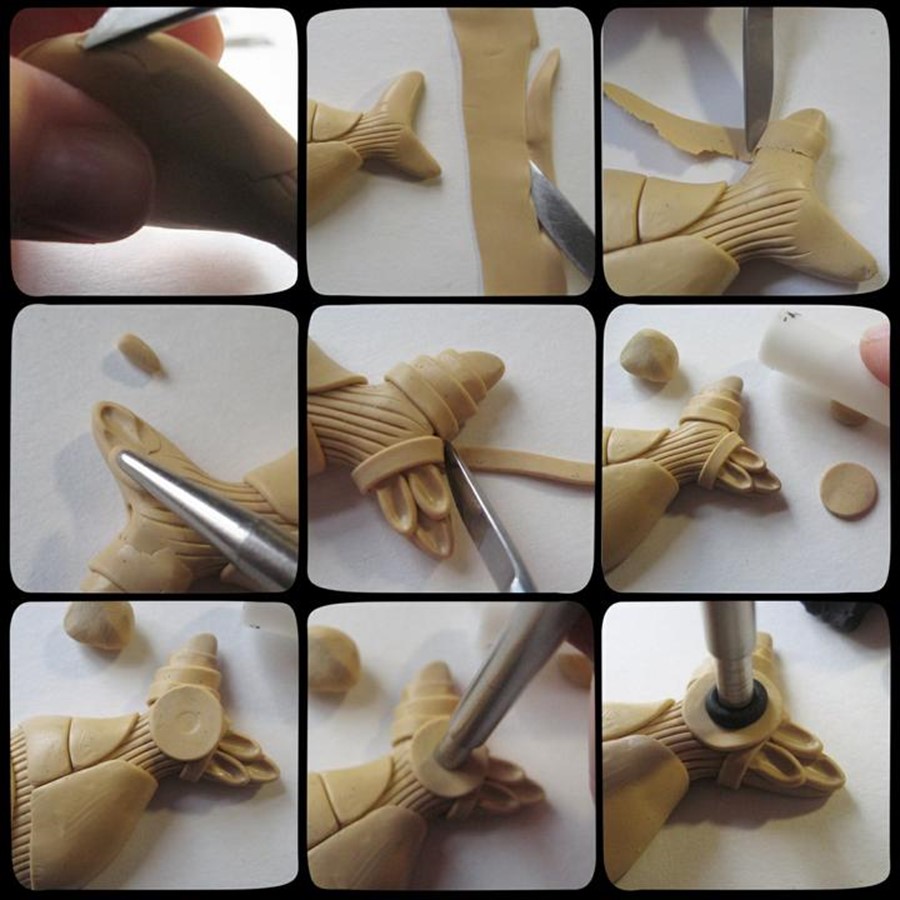
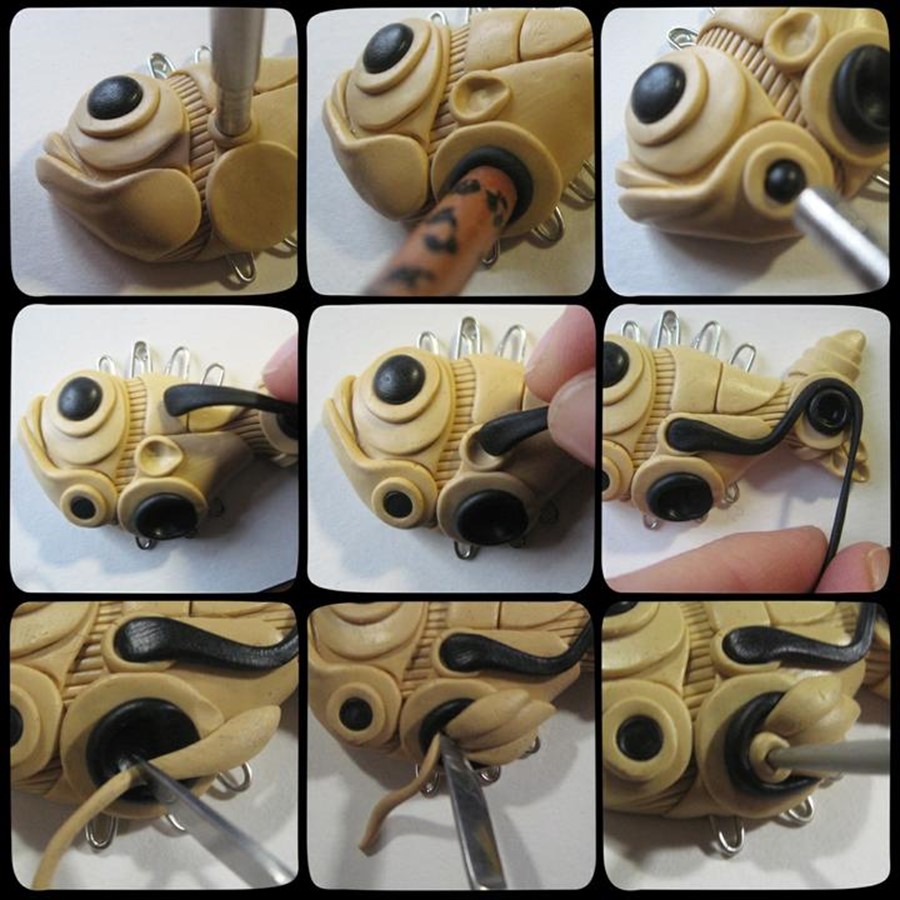
Make lower jaw, eyepiece on the oval or round patch. Top and bottom fins make of bent pins, remembering that the upper fin, usually more. It is the same dough we make parts out of clay.

Tip:
interesting biomechanical element out of the stretched tow squeezed through in the products.
Fin biomechanical fish just coming out of a manhole and similarity is formed by three stretched “feathers”.
Next, do an imitation of rivets: I am preparing a deepening that put small balls of polymer clay. Then a little squeezes them, piercing in the center of the toothpick. Turns out small accurate riveting.
Just a toothpick along the edge of the pierced holes for rivets, fixing the object on the body of the fish.
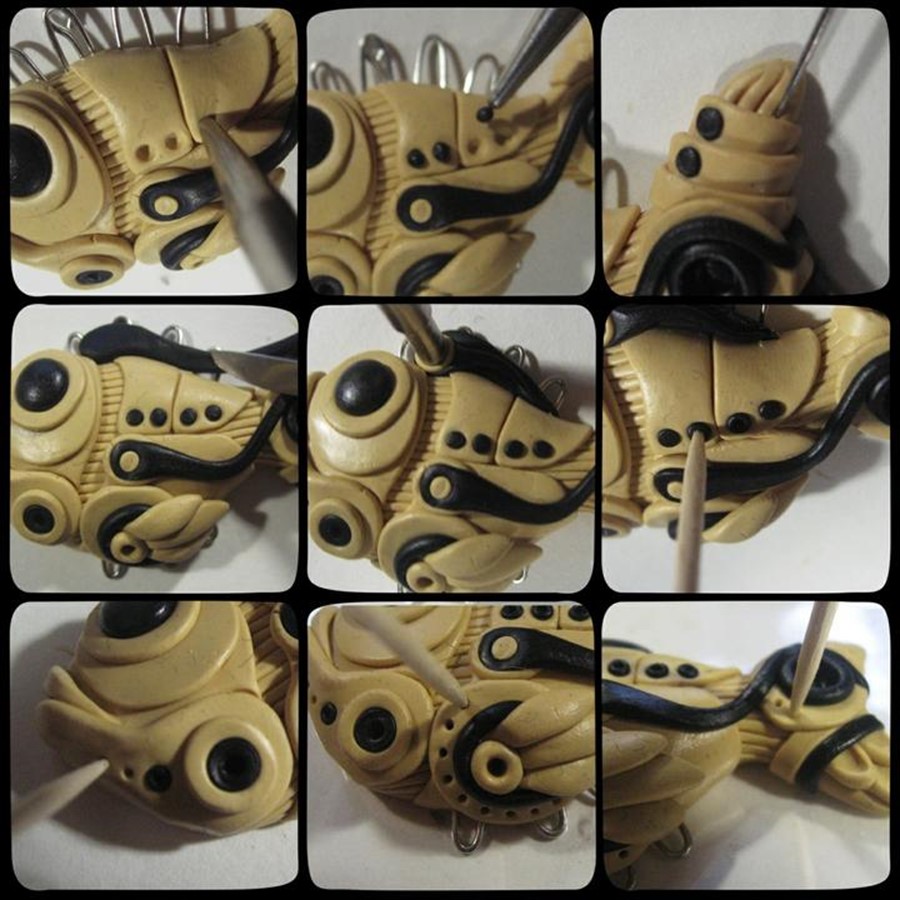
There are needle scratches on the casing cracks and, in consequence, they will give a more finished look fish, some old and from deliberate flatness.
And now the fun – painting! Smear the pastel chalks on the sand paper or use a blade, who as convenient. Take a thin brush and apply pastel in deepening. It is advisable not to put one color, and diversify the range of shades, it will give the liveliness, make it more interesting.
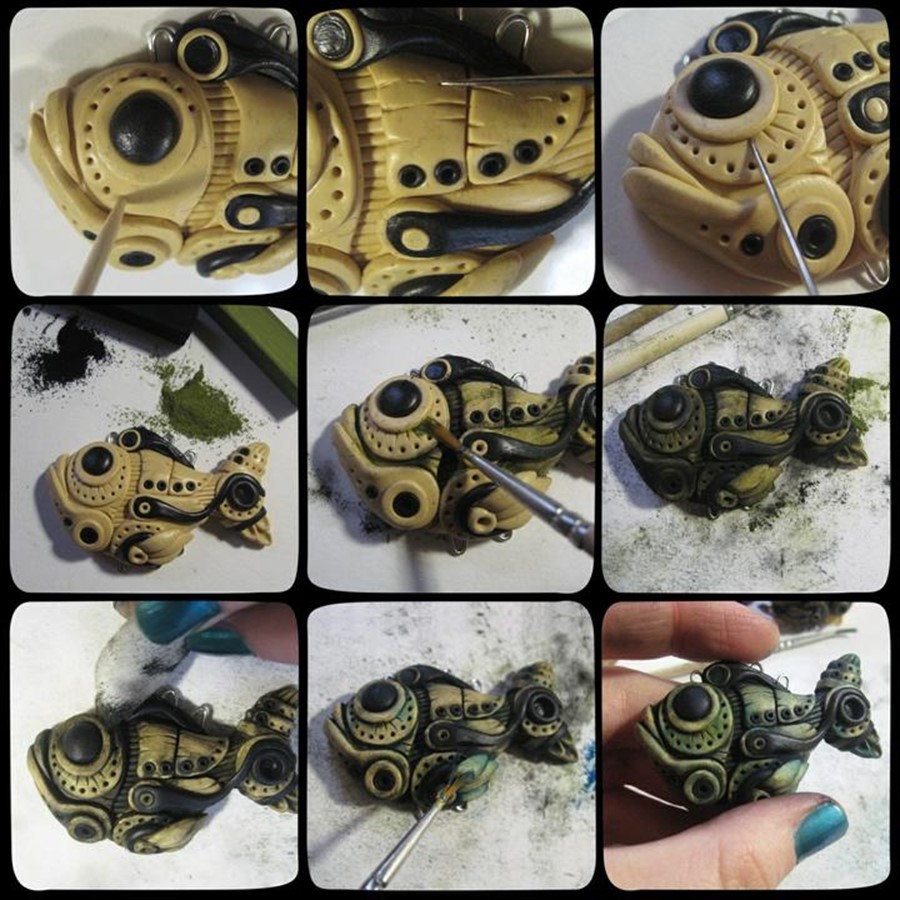
Then we wipe a damp cloth protruding parts. Do this as gently as a soft plastic can easily distort the slight movement. After clarification you can again take up the brush and go on an article where adding a couple of bright spots of color.
Burn the fish at temperature specified on the packaging of your polymer clay and if you wish to apply the varnish on the product. Biomechanical fish ready!
