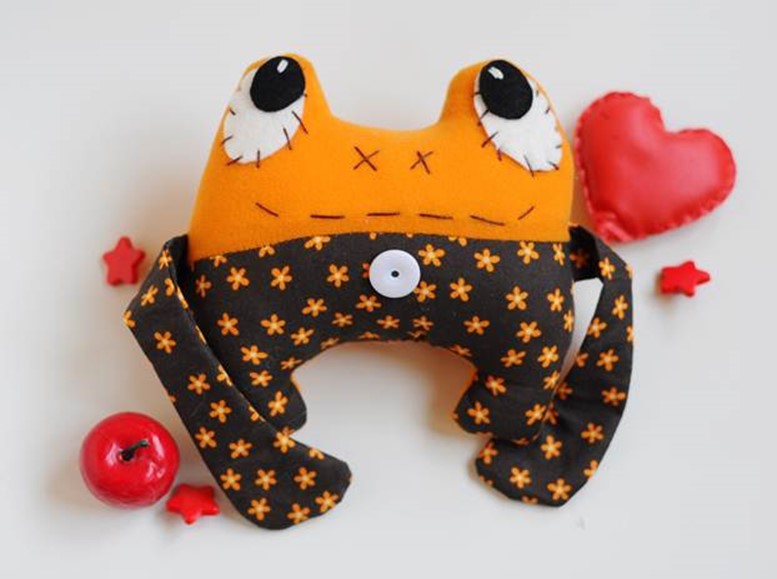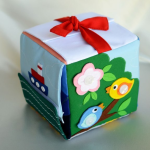
Handmade fun toy – Little Monster. DIY
You can make a soft toy – Little Monster. You can get to work and children will surely enjoy a fun toy.

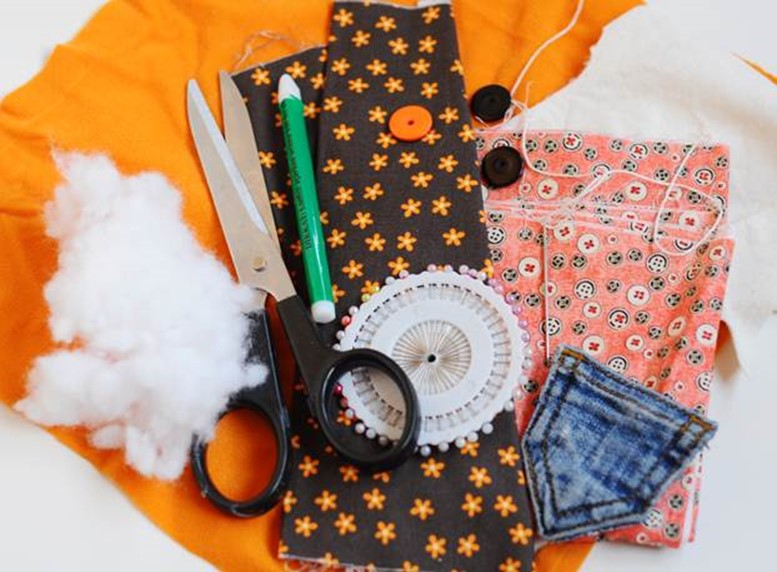
For the manufacture of Little Monster you will need:
- fabric of two or more colors for the Taurus and knobs (perfect jeans, biker, cotton, etc.). The first piece of approximately 10×8 inches (25×20 cm), the second 8×6 inches (20×15 cm)
- thin felt for eyes, button or bead for decoration
- thread type “Iris” for finishing
- needle, thread, scissors, a pencil or a remnant
- holofayber or other kind of stuffing
- sewing machine (if desired)
Progress of work
Sew a toy Little Monster is a snap, while picking up interesting combinations of fabrics with different texture, pattern and density, you can create a truly expressive and the original images. For fit and old jeans and a bright cotton with fine pattern or velvet, most importantly to the color and pattern materials harmoniously combined among themselves. I used a synthetic fabric with a velvety texture, cotton with a floral pattern in different ways by varying the fabric on the legs and belly.
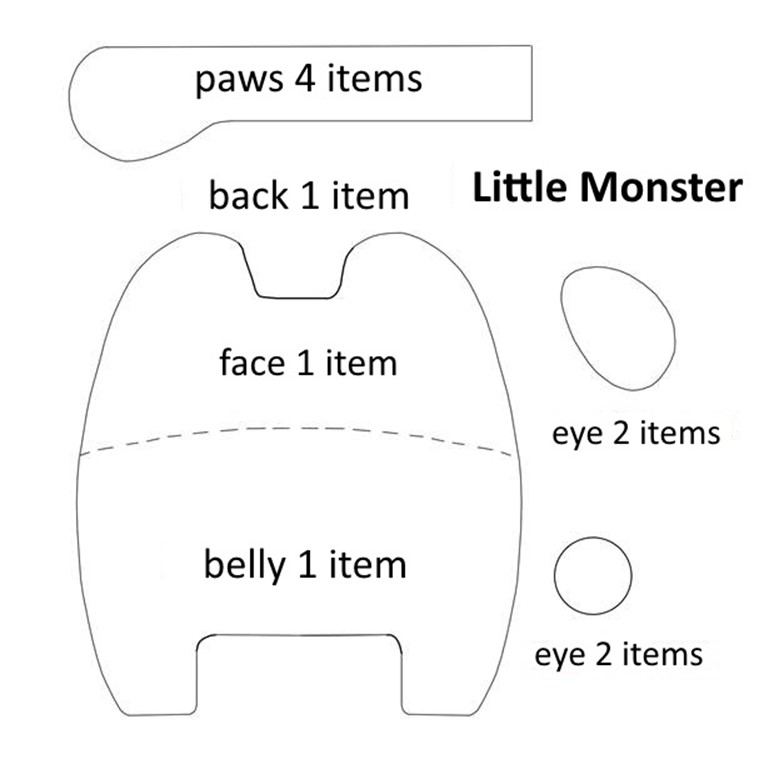
Create fantastic creatures have the maximum scope for creative options, that’s the pattern of soft toys-monsters can be used in different ways. If you want to make a toy from one kind of tissue, just cut two equal workpieces back. You can, like I do, carve out one detail of the back and the two faces and bellies from different types of tissue. If you wish, you can put the figure in a jumpsuit, then carve out four details by selecting one type of fabric for the feet, and the other for the head.
Reminder: to the rear and the front part of the toys comply with one another, be sure to leave at least 0,2 inches (1 cm) seam allowance on the seams at the edges!
Tip: to change the dimensions of the toys are very easy. The article pattern of soft toys can be increased or decreased using the photo editor on your computer or copy machine. For this pattern you can make even a sofa cushion in the form of long-arm monsters.
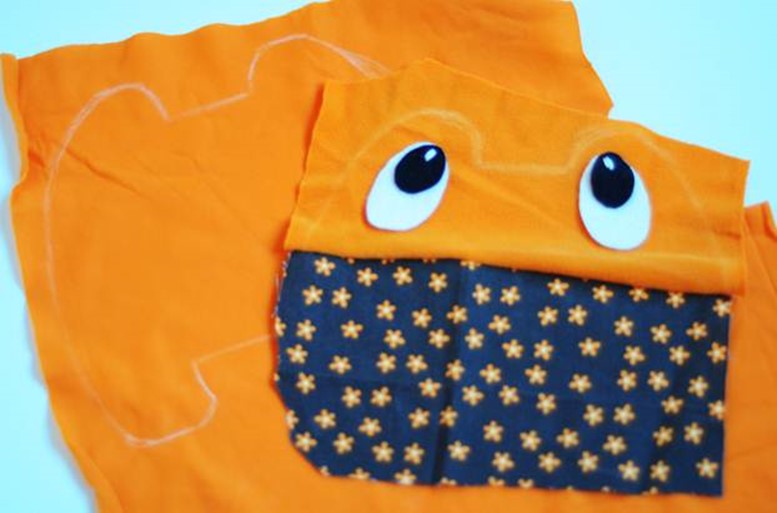
Details of the faces and the belly, remembering to leave the processing allowance, sew together. With this, I suggest to cut around the template on the fabric line wax or regular pencil, but did not find directly on them, so you can be sure that even if the seam a bit shift, he did not go beyond the edges of the fabric and not get holes in a toy.
Reminder: for fast and reliable connection of details you can use a sewing machine, but if it’s not handy, you can sew and stick figure manually. To do this, I recommend using a seam forward needle or frequent seam.

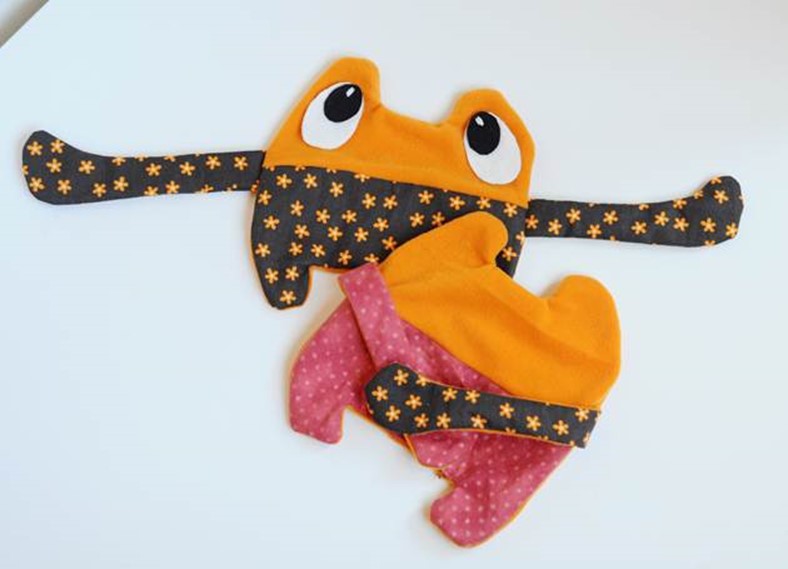
While postponing the cut figurines, cut pictures and sew a long handle toys. For handles, I propose to take the bright fabric, you can use this as the one and on the trunk, the material, and a completely different fabric. Sew details, putting their face inside, leaving the free hole on the end through which cut out handles on the front side. I suggest not to fill the pen, but nothing prevents you to experiment on your own.
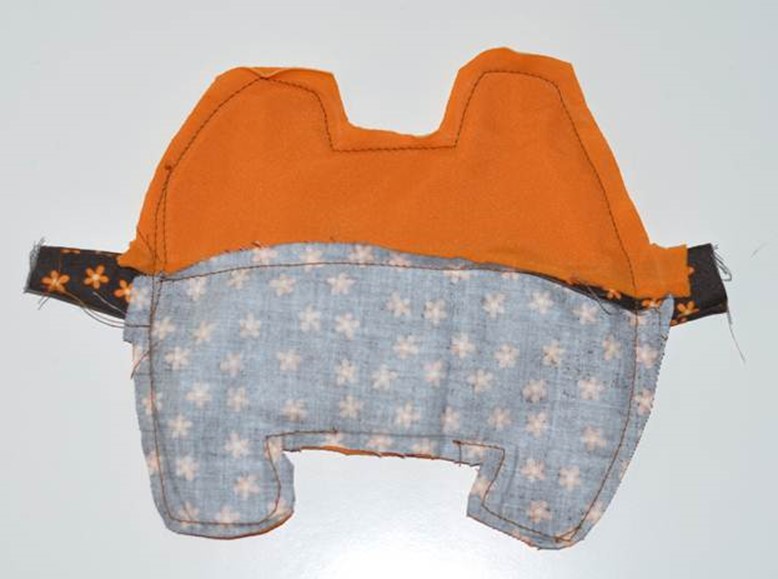
When the handles are ready, connect the body parts face inside, not forgetting to put the inside handle and symmetrically to each other and secure them with pins. Stitch figure entirely, leaving a small hole at the bottom to stuff and turn out the monsters.
Flatten middle seam, cut out figure and begin stuffing and decoration.
For stuffing any toys I suggest to use holofayber or polyester batting-filler, which usually use in the sofa cushions. It is sold by weight in shops for sewing and needlework and has a homogeneous structure, which enables you to evenly fill any shape. As an alternative, you can use cotton wool, scraps of fabric or polyester, but there is no guarantee that, at the touch of a heterogeneous material will not be visible.
Tamp toys should be tightly, pushing the stuffing into all corners and curves of the form. It is because of the density of padding, so important when sewing pieces, pay attention to the density of the stitches that will withstand severe strain.
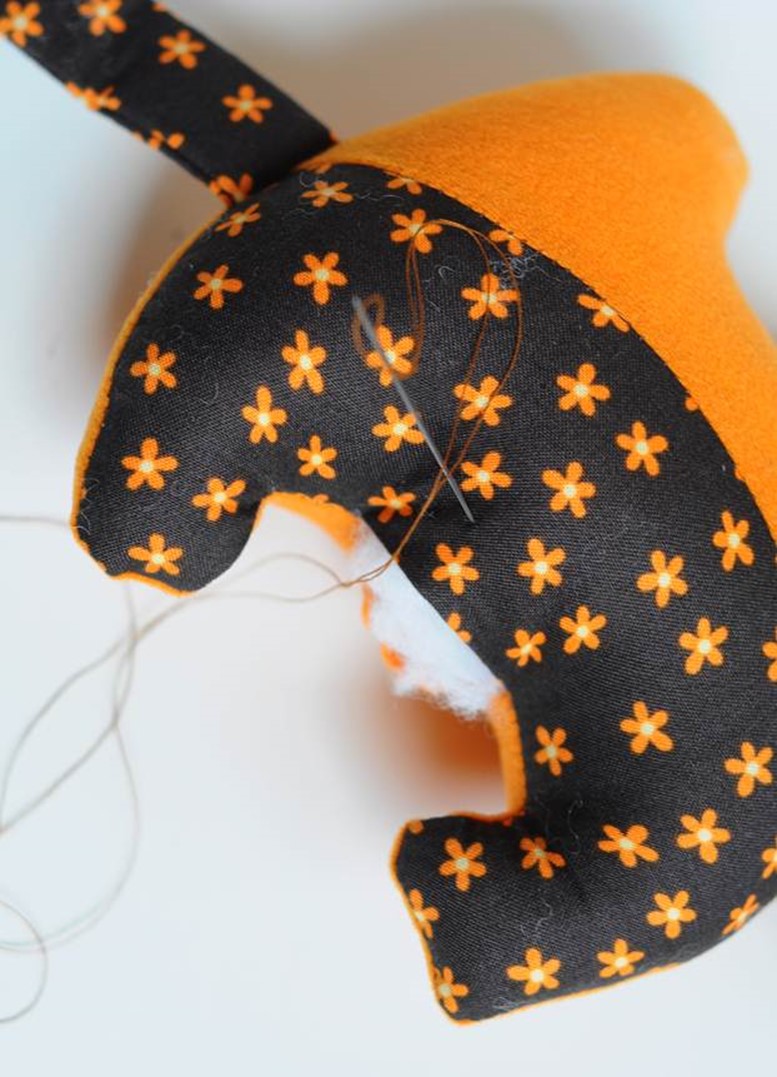
Once the toy, take the thread under fabric and color as quietly close the hole using a blind stitch. When the body is ready, you can proceed to registration. I made large eye of the thin sheet of felt, and the rest decided to embroider, but you can always rely on your own taste and imagination.
Eyes can be stuck special glue for textiles, glue gun or sew with stitches as additional decor. I chose the last option.

Tip: you can hide the knot under the foot or the part of the eye.
Nose and a smile, too, can be done in different ways: stick, draw markers on fabrics or embroider. All options can be interesting in its own way, but the big easy embroidery stitches seems to me to be the most sensible option. Embroidery can be gently shape the smiles pencil.
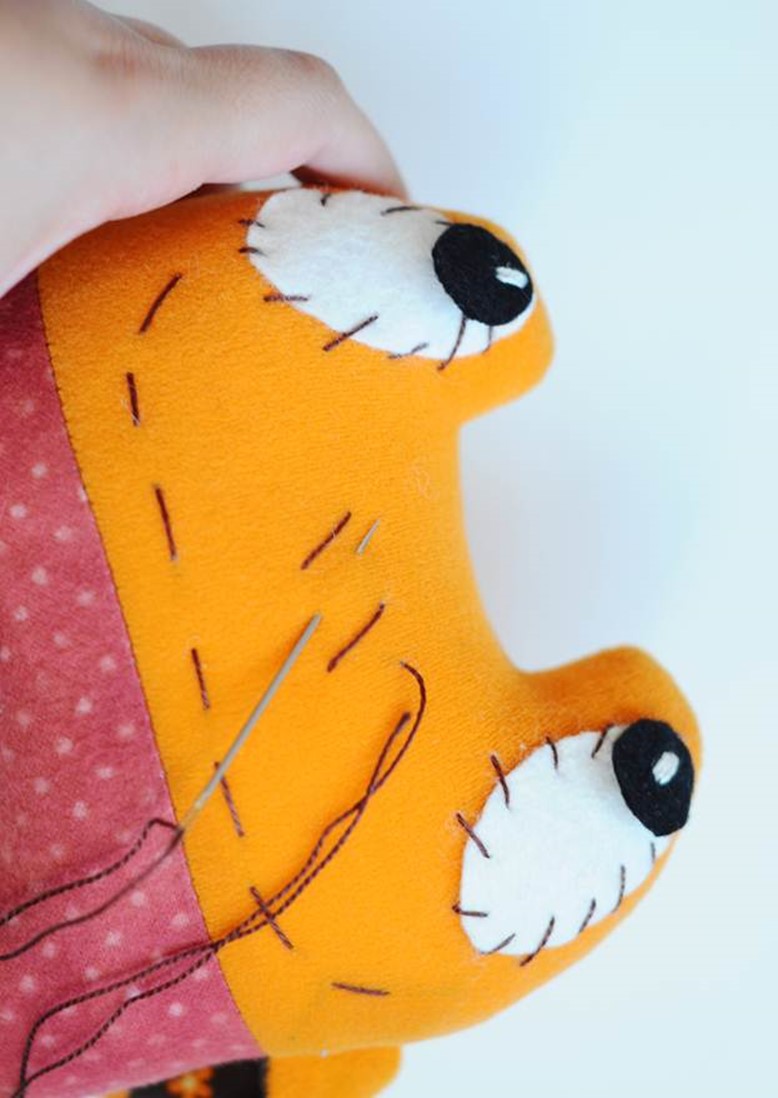
When the muzzle is ready, we only stuck button, bow or any other decor to your taste. Your personal funny monsters with hugging paws is ready!